

CSS Selectors 101: The Art of Pointing
You cannot style what you cannot target. Learn how to address your HTML elements with precision using CSS selectors.
H
CS Graduate | Technical Writing | Software development | 50K+ impressions
Search for a command to run...
You cannot style what you cannot target. Learn how to address your HTML elements with precision using CSS selectors.
No comments yet. Be the first to comment.
These are the assignments or knowledge dumps I decide to write for the "Chai aur Code's web Dev Cohort 2026"
When I first learned JavaScript, my answer to every problem was a for loop. Need to double some numbers? Write a for loop. Need to filter out inactive users? Create an empty array, write a for loop, a
RAG helps LLMs answer questions using your own data, but it doesn't guarantee correct answers. Here's how the pipeline works and where it commonly breaks down.
Imagine asking an AI, "Write a blog," versus "Act as an SEO expert and write a 1,000-word blog on AI safety formatted in markdown." The difference in the resulting output is night and day. A prompt is
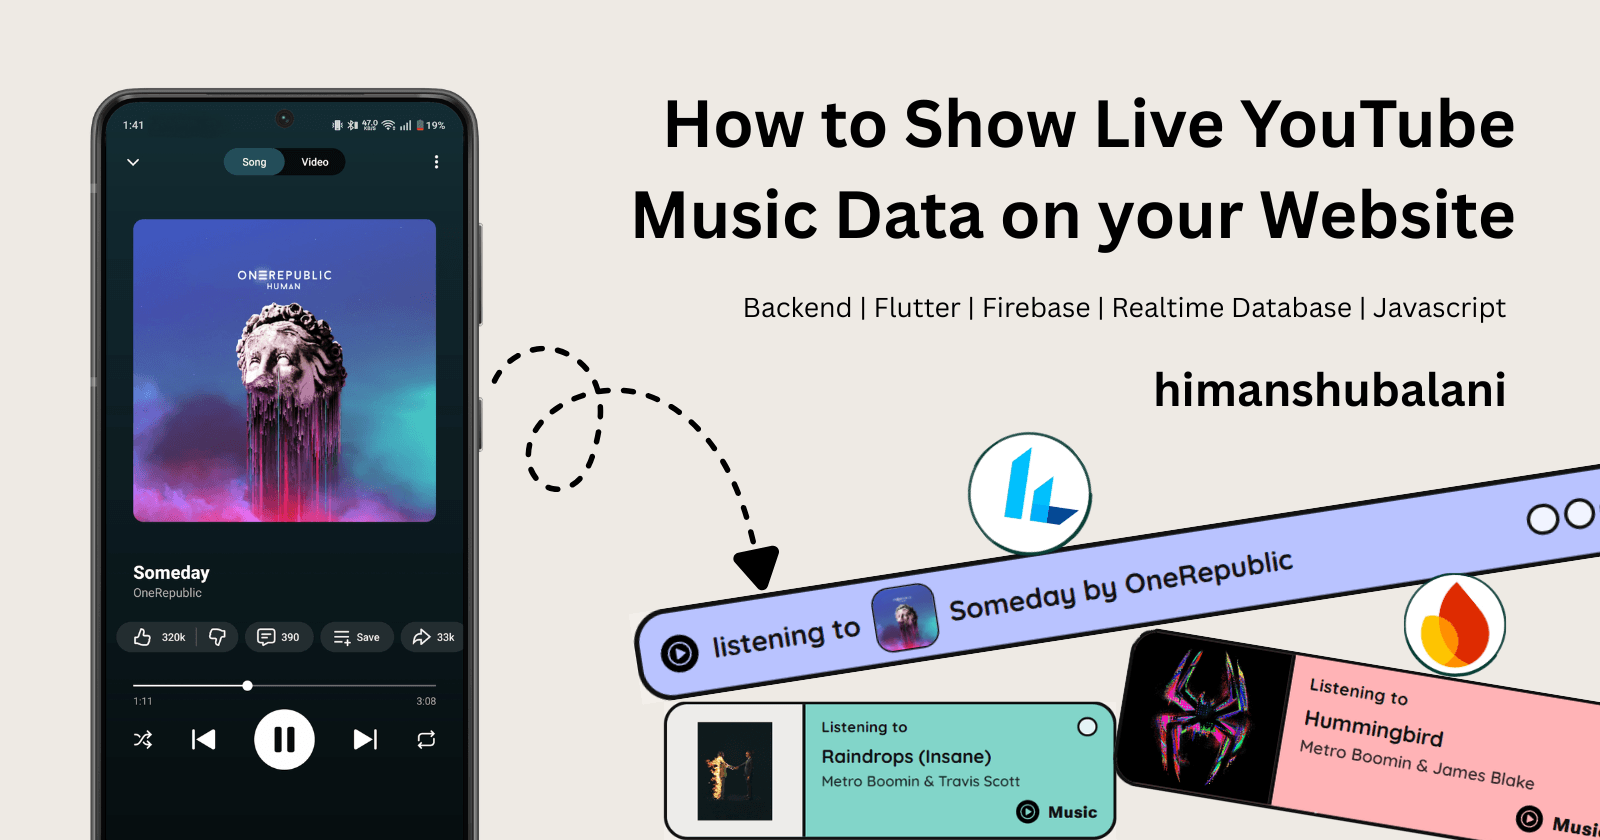
Spotify and Apple Music make it incredibly easy to showcase your live listening habits on your website. YouTube Music? Not so much. After doing some setup you can do an API call and fetch your account
Arthur C. Clarke's famous third law: "Any sufficiently advanced technology is indistinguishable from magic" perfectly captures how the pace of human innovation works. From carrying supercomputers in o

Why HTTP is amnesiac, the difference between transport and state, and how to choose the right auth strategy for your Node.js app.
CSS is essentially just a list of instructions: make the text bold, make the background blue, add some space here.
But before the browser can execute any of those instructions, it needs to know exactly who the instructions are for. If you just write color: blue;, the browser throws its hands up. Make what blue? Everything? Just the links? Just the title?
To tell the browser what you want to style, you use CSS Selectors.
If CSS is a language, the selector is the noun. It is how you point at an element in your HTML and say, "You. Listen to these rules."
To understand how selectors work, imagine you are standing in a crowded room with a megaphone, trying to give instructions to the crowd. Depending on who you want to talk to, you have to use different methods to get their attention.
The simplest way to point at things is by their HTML tag name.
If you are holding the megaphone, this is the equivalent of yelling, "Everyone, stand up!" It is a broad, blunt instrument.
If you use an element selector, the browser will scour the entire page, find every single instance of that HTML tag, and apply your styles to all of them.
The HTML:
<p>I am a paragraph.</p>
<p>I am another paragraph.</p>
The CSS:
/* Point at every <p> tag on the page */
p {
  color: red;
}
The Result: Every single paragraph on your entire website turns red.
Element selectors are great for setting global baselines (like making all <h1> tags a certain font), but they are usually too broad for specific UI design.
What if you have ten paragraphs, but you only want to highlight two of them? You can't use the element selector, because that hits all ten.
Instead, you use a Class Selector.
In our room analogy, this is like yelling, "Everyone wearing a blue shirt, stand up!" You don't care who the person is, you only care that they belong to the "blue shirt" group.
In HTML, you assign an element to a group using the class attribute. In CSS, you target that class by putting a dot (.) in front of the name.
The HTML:
<p>I am normal text.</p>
<p class="warning">I am a warning message!</p>
<button class="warning">Delete Account</button>
The CSS:
/* Point at anything with the class "warning" */
.warning {
  color: orange;
  font-weight: bold;
}
Notice that we applied the .warning class to both a <p> tag and a <button>. Classes are completely reusable. They are the absolute workhorse of modern CSS. You will use classes for 95% of your styling.
Sometimes, you need to point at one specific, unique thing on the page.
In the crowded room, this is like yelling, "Bob, stand up!" There is only one Bob.
In HTML, you give an element a unique identifier using the id attribute. In CSS, you target that ID by putting a hash (#) in front of the name.
The HTML:
<nav id="main-navigation">
  <a href="/">Home</a>
</nav>
The CSS:
/* Point at the single element with the ID "main-navigation" */
#main-navigation {
  background-color: black;
}
[ . ] CLASS -> Used for MANY elements. (e.g., .card, .btn)
[ # ] ID    -> Used for ONE element per page. (e.g., #header)
A warning: Because IDs are strictly unique, they are rigid. If you style a button using an ID, and later decide you want a second identical button, you can't reuse the ID. Because of this, experienced developers rarely use IDs for styling, preferring to stick with classes.
If you have the exact same CSS rules for three different things, you shouldn't write the rule three times. You can group your selectors together by separating them with a comma (,).
This is like yelling, "Bob, Alice, and everyone in a blue shirt, stand up!"
The CSS:
/* Point at all h1s, all h2s, and the .subtitle class */
h1, h2, .subtitle {
  font-family: 'Helvetica', sans-serif;
  text-align: center;
}
The comma simply means "AND". It keeps your code DRY (Don't Repeat Yourself).
Often, you only want to style an element if it lives inside a specific container.
In our analogy, this is like yelling, "Everyone with a blue shirt who is currently sitting in the back row, stand up!" If someone has a blue shirt but is in the front row, they ignore you.
In CSS, you target descendants by separating your selectors with a space.
The HTML:
<div class="card">
  <h2>Card Title</h2>
  <a href="#">Read More</a>
</div>

<div class="footer">
  <a href="#">Privacy Policy</a>
</div>
The CSS:
/* Point ONLY at <a> tags that live inside a .card */
.card a {
  color: blue;
  text-decoration: none;
}
Because of the space, the browser looks for the .card first. Then, it looks inside that card for an <a> tag. The link in the footer is completely ignored because it isn't inside a .card.
Because you can target the same HTML element in multiple ways, those rules will eventually collide.
What happens if you point at a paragraph and say "be red", but then point at its class and say "be blue"?
<p class="special">What color am I?</p>
p { color: red; }
.special { color: blue; }
CSS resolves this using a concept called Specificity. It basically asks: Which selector is more precise?
An Element selector (p) is very generic. (Low priority)
A Class selector (.special) is more specific. (Medium priority)
An ID selector (#unique) is highly specific. (High priority)
Because a class is more precise than a generic element tag, the browser applies the class rule. The text will be blue.
When you are learning CSS, it is tempting to jump straight into the flashy stuff: animations, flexbox layouts, drop shadows.
But none of that matters if you can't accurately apply it. Selectors are the absolute foundation of CSS. If you can master the difference between a class (.), an ID (#), and a descendant (a space), you will stop fighting the browser, and start actually designing.